How to make a virtual tour with an Iphone/iOs?
Capturing 360° images with your iPhone is a breeze. Anyone can do it, no special equipment is needed. Just follow this step-by-step guide and you will have your captures ready to upload to RealAdvisor VR in no time!
What app can I use to capture 360° images?
You can choose from many free or premium applications available on the App Store. Our recommended app is Google Street View - it is free, easy to use and produces good results. See below for a detailed guide.
Capturing 360° images with Google Street View app
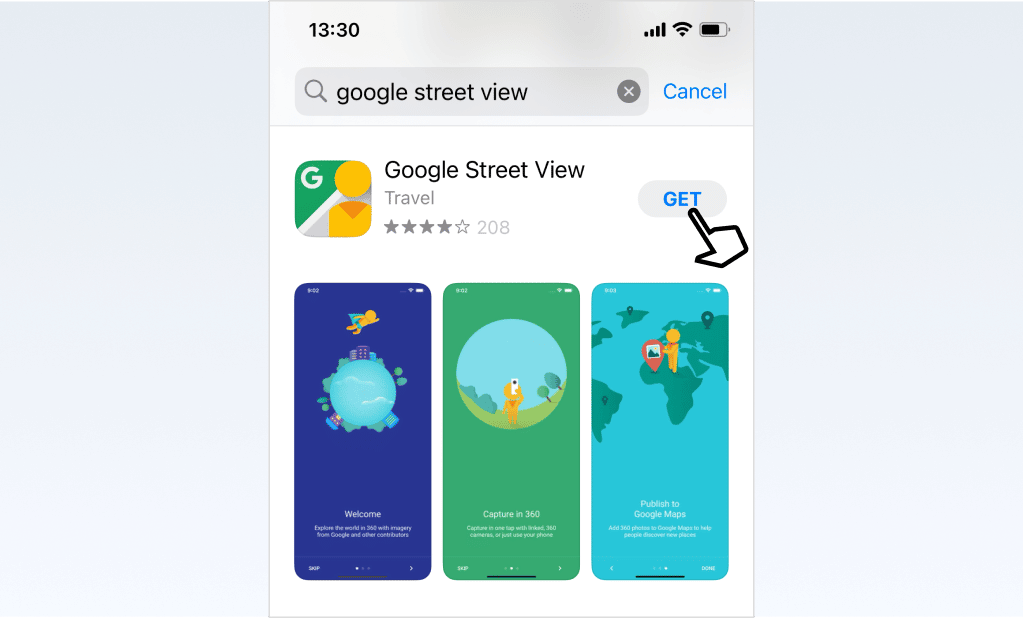
To download the Google Street View app:
- Open the “App Store” on your phone - you will find it among your applications
- Tap the search bar and search for “Google Street View”
- It should come up in your suggested results - tap the suggestion
- Tap the “Install” button
- Open the app once the installation is finished

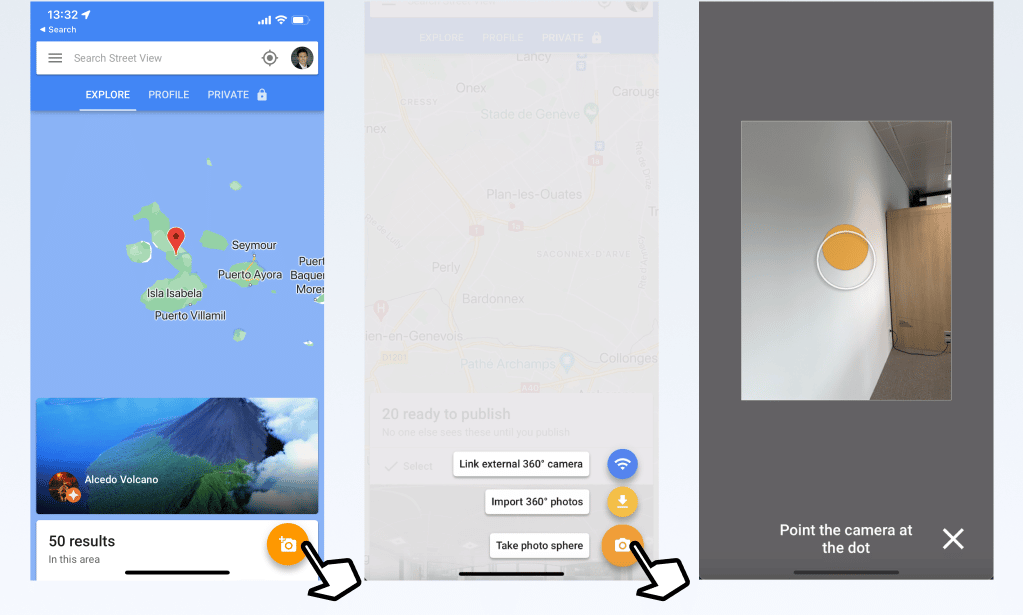
To capture a 360° photo using the Google Street View app:
- Open the application
- Tap the “Create” icon in the bottom menu bar
- Tap the “Take photo Sphere” option (you may be asked to allow the Google Street View application to use your device’s camera)
- Point the phone directly in front of you, aligning with white circle around the first orange circle that appears and hold your phone in place until the image is captured
- Continue panning around to capture all orange dots that appear and your 360° panorama is complete (try to keep your phone in one place and rotate it there, at the imaginary centre of a sphere)
- Tap the “tick” icon at the bottom of the screen when done (it will turn green to indicate that the capture is fully done

Uploading your images to RealAdvisor VR
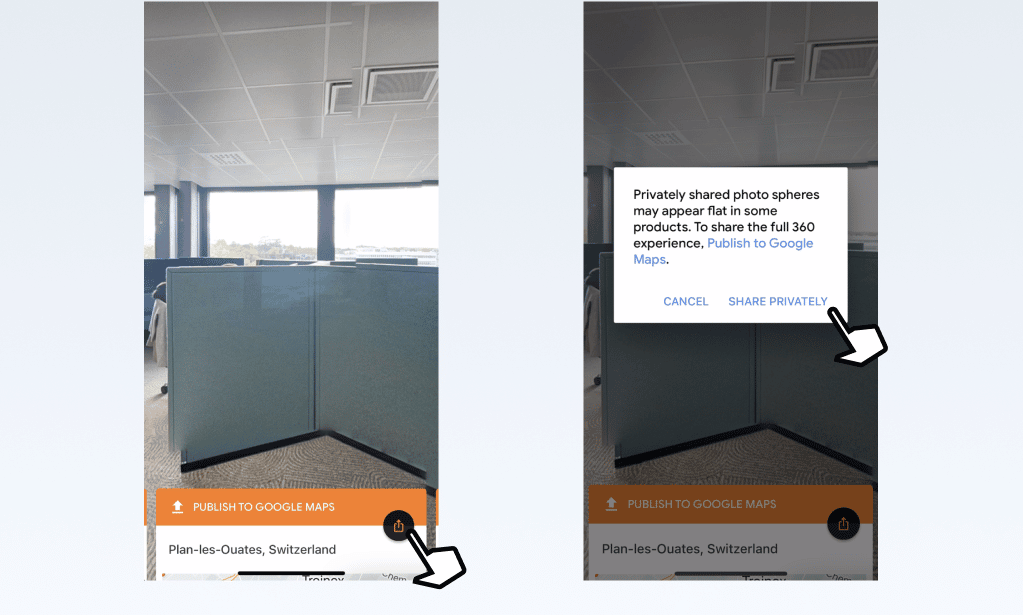
Once you have captured your 360° photos, you can share them send them to another device (for example your laptop for easier editing of your tour) in the following way:
- Tap the Share icon on the card representing your captured scene
- Select the option to share privately
- Choose your preferred mode of sharing (e.g. AirDrop to another Apple device)

To upload your 360° images in RealAdvisor VR, all you need to do is to click “Upload photos” when creating your tour and select your files.